How to Compare 2 Documents Word: Desktop & Online Guide 2026
You've just received two Word files from a colleague. One is called “final,” the other is called “final revised,” and neither name tells you which version contains the approved contract language. Reading both documents from beginning to end might reveal some changes, but it's easy to miss a deleted sentence, a revised number, or a subtle formatting change. Word's Compare Documents feature creates a structured redline so you can review the differences instead of relying on memory.
The workflow works for contracts, reports, marketing copy, academic papers, policies, and shared drafts. It also gives you a safer result: Microsoft's legal blackline method creates a third document containing the comparison, while the original and revised files remain unchanged (Microsoft Support). The important part is using the right comparison settings, reading the markup correctly, and merging only after someone has reviewed the changes.
Table of Contents
- The Moment You Realize You Need to Compare Two Word Documents
- Running Compare Documents in Word Desktop
- Reading the Result With All Markup, Simple Markup, and No Markup
- Choosing Character Level vs Word Level in Legal Blackline
- Comparing Versions Stored in OneDrive or SharePoint
- Merging Edits the Right Way Using Accept and Reject
- Habits and Quick Fixes for Cleaner Comparisons
The Moment You Realize You Need to Compare Two Word Documents
The problem usually arrives in an ordinary email. A colleague forwards an earlier contract and a newer attachment, then asks you to “send back a clean redline.” A client has edited the document without Track Changes, so the revised file looks polished but gives you no obvious record of what moved. Or a teammate updates a shared policy while you're offline, and you need to know whether the change affects only wording or also the underlying obligation.
Opening the files side by side helps at first. You can search for familiar phrases, scroll through matching headings, and compare paragraphs manually. That approach becomes unreliable when edits are small, scattered across tables, or mixed with formatting changes. A clean-looking page can hide a deleted clause just as easily as an obvious paragraph revision can attract attention.
Practical rule: Treat comparison as a review workflow, not as a hunt for visual differences.
Word has supported a standardized comparison process for a long time. You open one document, use Review > Compare > Compare Documents, select the original and revised files, and let Word generate a marked-up result (Microsoft's Compare and Merge documentation). Microsoft also documents a legal blackline mode that can inspect changes at the character or word level, which makes the feature useful beyond casual proofreading.
Editors, lawyers, marketers, students, and project teams can all use the same basic process. The difference is what they do after Word creates the redline. A lawyer may verify every clause and preserve an audit trail. An editor may focus on wording and comments. A student may want to understand how a supervisor changed a draft. In every case, the safest path is to preserve both source files, generate a separate comparison, inspect it in a readable markup view, and merge deliberately.
Running Compare Documents in Word Desktop
Before clicking through the ribbon, make two quick decisions. Identify which file is the original and which is the revised version, then make working copies if the files are important. Word's comparison result depends on that direction, because insertions and deletions are presented relative to the original document.
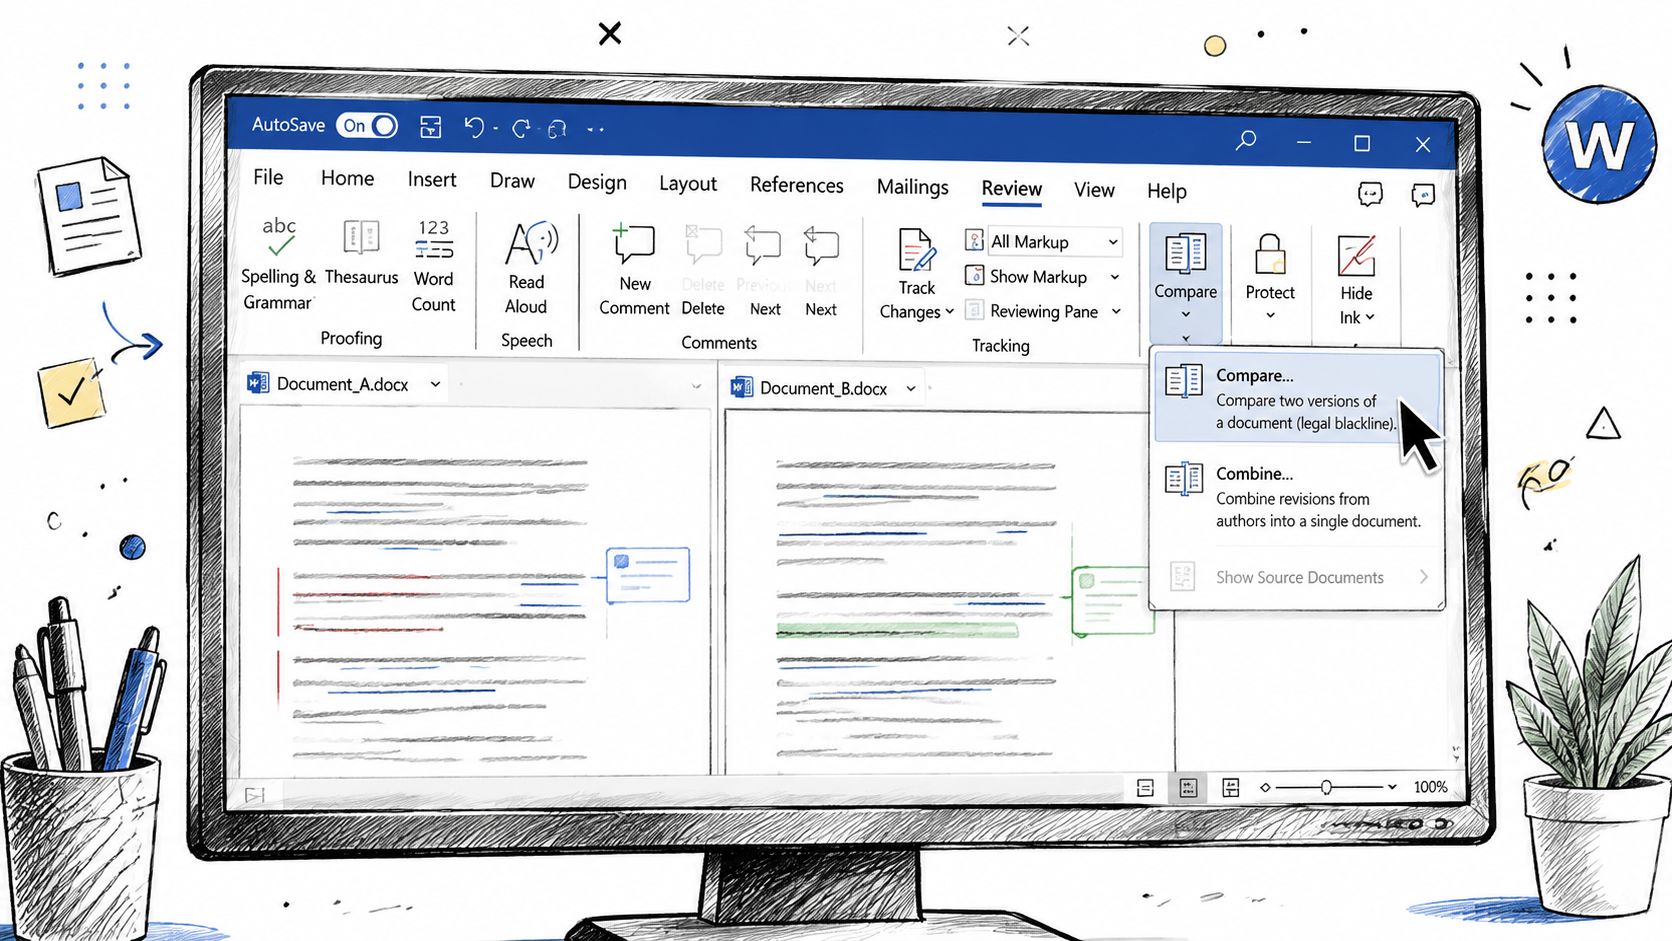
Follow the desktop click path
- Open Word desktop. Open either document first. It doesn't matter which one you open, because you'll assign the roles inside the comparison dialog.
- Choose Review. Select the Review tab in the ribbon at the top of the Word window.
- Open Compare. Find the Compare control, then select Compare Documents from its menu.
- Select the original. In the dialog box, use the original-document browse control to locate the earlier file.
- Select the revised document. Use the revised-document browse control to choose the later file.
- Review comparison settings. Word may let you identify the author, date, and label associated with the markup. Add information that will help the next reviewer understand who or what produced the redline.
- Choose the comparison scope. If formatting, comments, or other document elements are distracting from substantive wording, adjust the available settings before running the comparison.
- Confirm the comparison. Select OK and wait for Word to create the result.
Word returns a new document containing revision marks that indicate where one document differs from the other (Microsoft Learn). The compared files themselves aren't supposed to be overwritten by this process, but save the new redline with a clear filename rather than treating it as the source of truth.
Matching file formats helps. If one file is a modern .docx file and the other is an older .doc file, save compatible working copies before comparing. Close unused Word windows if the dialog shows confusing document names, and avoid saving the comparison over either original.
The result should resemble a tracked-changes document, even if nobody enabled Track Changes during the earlier editing session. Word's comparison process produces a third marked-up file, which is why it's useful for formal review and redlining.
This short visual walkthrough can help if you're still locating the controls in your Word build:
Reading the Result With All Markup, Simple Markup, and No Markup
The first comparison can look chaotic. Inserted text may appear underlined or colored, deleted text may appear with strikethroughs or in balloons, and formatting changes can add noise around otherwise identical paragraphs. Start with All Markup, because it exposes the complete revision record rather than presenting a simplified reading view.
Use each display mode for a different job
- All Markup shows the changes and their locations. Use it when you're auditing the redline.
- Simple Markup reduces the visual clutter while leaving revision indicators in the margin. Use it when you need to read the document and still see where changes exist.
- No Markup displays the document without visible revision marks. Use it to preview the apparent final wording, not to approve changes.
- Reviewing Pane lists revisions in a navigable summary. Use it when the page itself is too crowded to scan comfortably.
An insertion generally means text exists in the revised version but not in the original. A deletion means the original contained text that the revised version removed. Formatting marks can represent changes to styles, fonts, spacing, or layout rather than changes to the words themselves. Comments are separate review notes, so don't assume accepting a text revision also resolves the comment attached to it.
The vertical revision bar in the margin is useful for a fast first pass. It signals that a section contains changes, allowing you to jump between edited areas without scrolling through every unchanged paragraph. Use Previous and Next in the Review controls when you need a controlled review sequence.
For client delivery, inspect the document in All Markup first, then switch views to confirm that the intended wording is readable. You can print or export a reviewed redline when the recipient needs a fixed copy, but keep the editable comparison file for the working record. If you're checking a generated PDF before sending it, a separate PDF document comparison reference may help you think through the same review principle outside Word.
Choosing Character Level vs Word Level in Legal Blackline
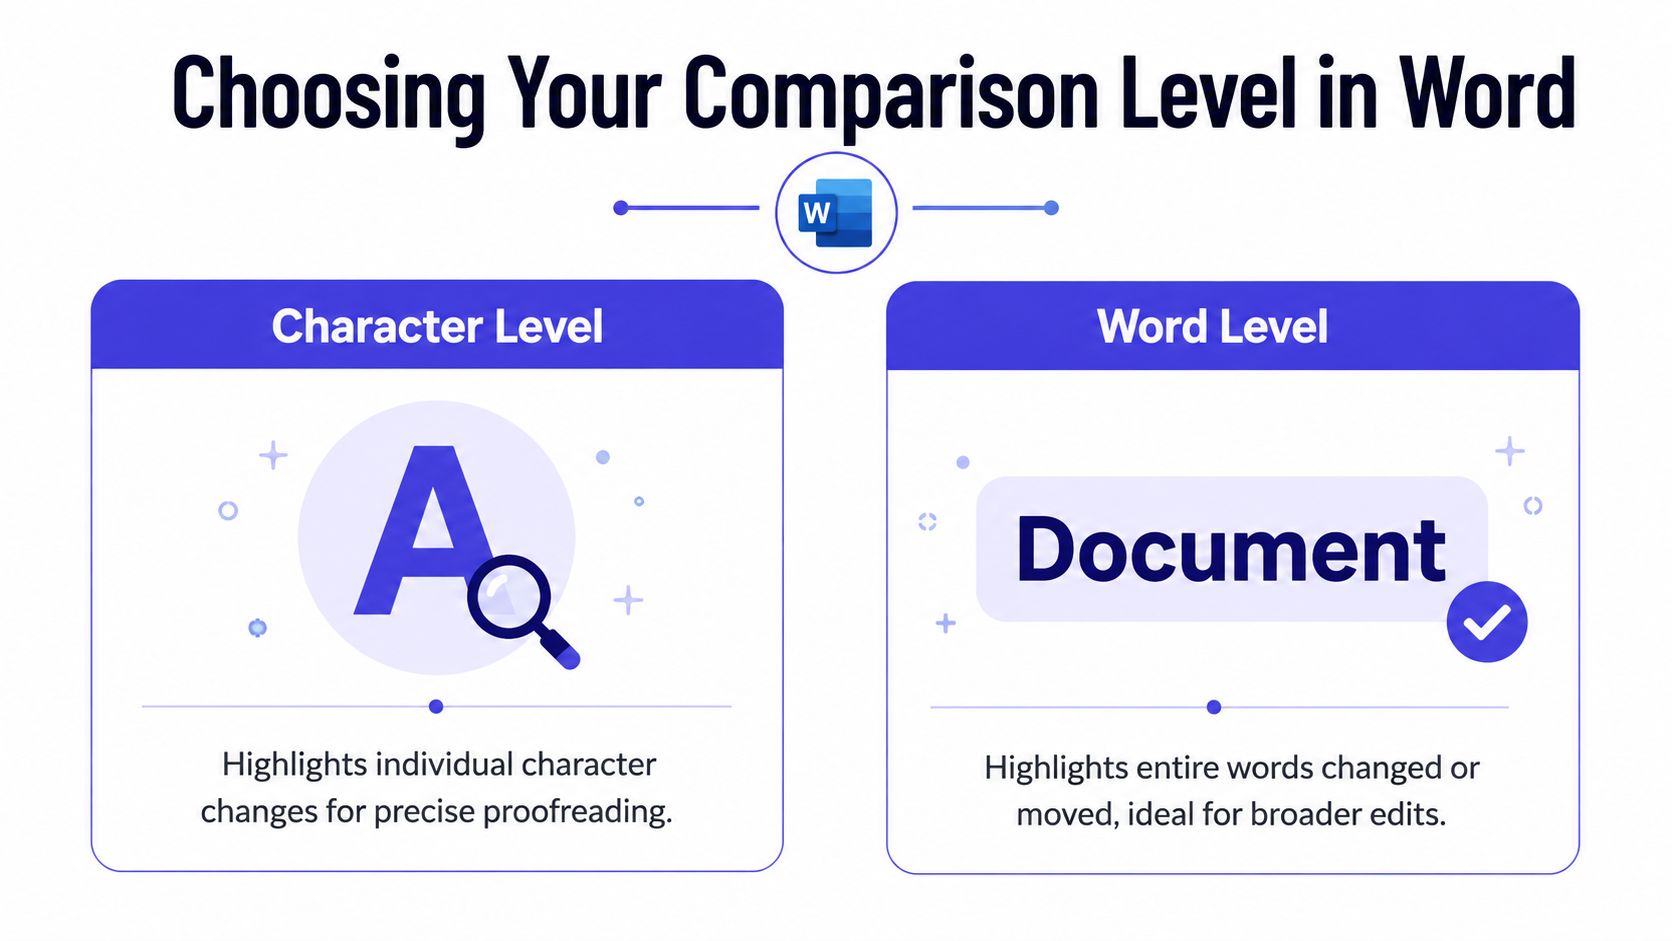
Word's legal blackline comparison is most useful when you choose a comparison granularity that matches the editing task. Character-level comparison is sensitive to micro-edits, such as a changed letter, punctuation mark, or small spelling adjustment. Word-level comparison groups changes around complete words, which can make heavily edited prose easier to read by reducing visual noise.
A proofreading pass benefits from character-level sensitivity. If a clause changes from singular to plural, or a small qualifier is inserted inside a word or phrase, character-level markup makes that difference visible. A broad editorial review may be easier at word level, particularly when the document contains many rewritten sentences and you need to understand the substantive change rather than inspect every keystroke.
Choose the setting based on the review question
| Review question | More suitable setting |
|---|---|
| Did a tiny spelling or punctuation edit occur? | Character level |
| Was a phrase replaced or rewritten? | Word level |
| Is the document heavily edited and visually noisy? | Word level |
| Must the reviewer inspect micro-edits? | Character level |
Formatting and comments can also distract from the text. If the purpose is to audit wording, narrow the comparison scope so formatting and comments don't overwhelm the substantive redline. That doesn't mean those elements are unimportant. It means you should decide whether they belong in this review or in a separate quality check.
Normalize files before comparing
A clean comparison starts before the Compare dialog opens. Use the same file format where possible, back up the originals, remove draft watermarks that create irrelevant differences, and confirm that each file has the identity and revision state you expect. Also check document boundaries, styles, tables, metadata, and other structural elements, because a text-only scan can look clean while the document structure differs.
Common failure modes include mismatched extensions, files opened in a partially corrupted or compatibility state, inconsistent styles, and comparisons performed without checking tables or metadata. If the result shows no meaningful changes, don't immediately assume the documents are identical. Confirm that you selected the correct original and revised files, then reopen or resave questionable documents before running Compare again.
Side-by-side reading remains useful for orientation, but it doesn't classify or quantify revisions. The compare engine creates structured revision marks, which gives editors and legal reviewers a more dependable basis for decisions. For teams handling document-heavy workflows, specialist resources such as AI document review software can provide additional context, but Word's own redline should remain the reference when the work must stay inside the Microsoft document workflow.
Comparing Versions Stored in OneDrive or SharePoint
Cloud storage changes where you find the files, not the basic logic of comparison. You still need a known earlier version and a current version, but OneDrive and SharePoint can preserve those versions inside the document's history instead of forcing you to rely on filenames such as “final,” “final2,” and “approved.”
Use version history as your source list
Open the document in Word, then go to File > Info and look for Version History. In OneDrive or SharePoint, the exact panel can vary by Word build and organizational settings, but the purpose is the same. Review the saved versions, identify the checkpoint you want, and open that version for inspection.
If your build supports direct comparison from version history, select the current document and the relevant saved version through the available comparison command. Newer Word builds can compare a current document against a specific saved version, although the exact controls may differ between desktop, browser, and organization-managed installations.
If direct comparison isn't available, use a temporary copy of the earlier version. Open or download that version without replacing the current file, then run Review > Compare > Compare Documents and select the temporary copy as the original and the active file as the revised document. Save the generated redline as a separate working file so the cloud document's version trail remains intact.
Meaningful checkpoint names make this easier. AutoSave can preserve edits, but it doesn't tell a reviewer why a version matters. Add a useful description where your team's SharePoint process allows it, and avoid comparing while another editor has the file locked or is actively changing the same content.
Cloud-review habit: Preserve the version history first, then create a separate redline for discussion.
Teams that move or reorganize SharePoint libraries should understand the difference between a comparison task and a migration task. Guidance on how to avoid SharePoint data loss is useful when the larger concern is preserving historical context, permissions, and document continuity. For a file that needs conversion before review, this free file-converter workflow may also help you prepare a compatible working copy.
Merging Edits the Right Way Using Accept and Reject
A redline is not the final document. It's a decision surface that shows what changed so a person can approve, reject, or investigate each revision.
Suppose the contract comparison reveals a changed delivery date, a rewritten definition, and a formatting adjustment in a table. Start in All Markup, select Next, and review the first change in context. Choose Accept when the revised wording is approved, or Reject when the original should remain. Continue through the document rather than accepting everything automatically unless the reviewer has already confirmed that every change is valid.
Keep the source of truth clear
Use Accept All Changes only when the comparison has been fully reviewed and the revised document is unquestionably the version your team wants to publish. Use Reject All Changes when the original must be restored and the redline was created only for investigation. For mixed outcomes, process changes individually or in logical groups.
Comments need their own decision. Resolve or delete comments according to your team's recordkeeping requirements, but don't treat comment removal as proof that the associated wording was approved. If the document still needs sign-off, leave the tracked revisions visible and save the review-stage file separately from the clean distribution copy.
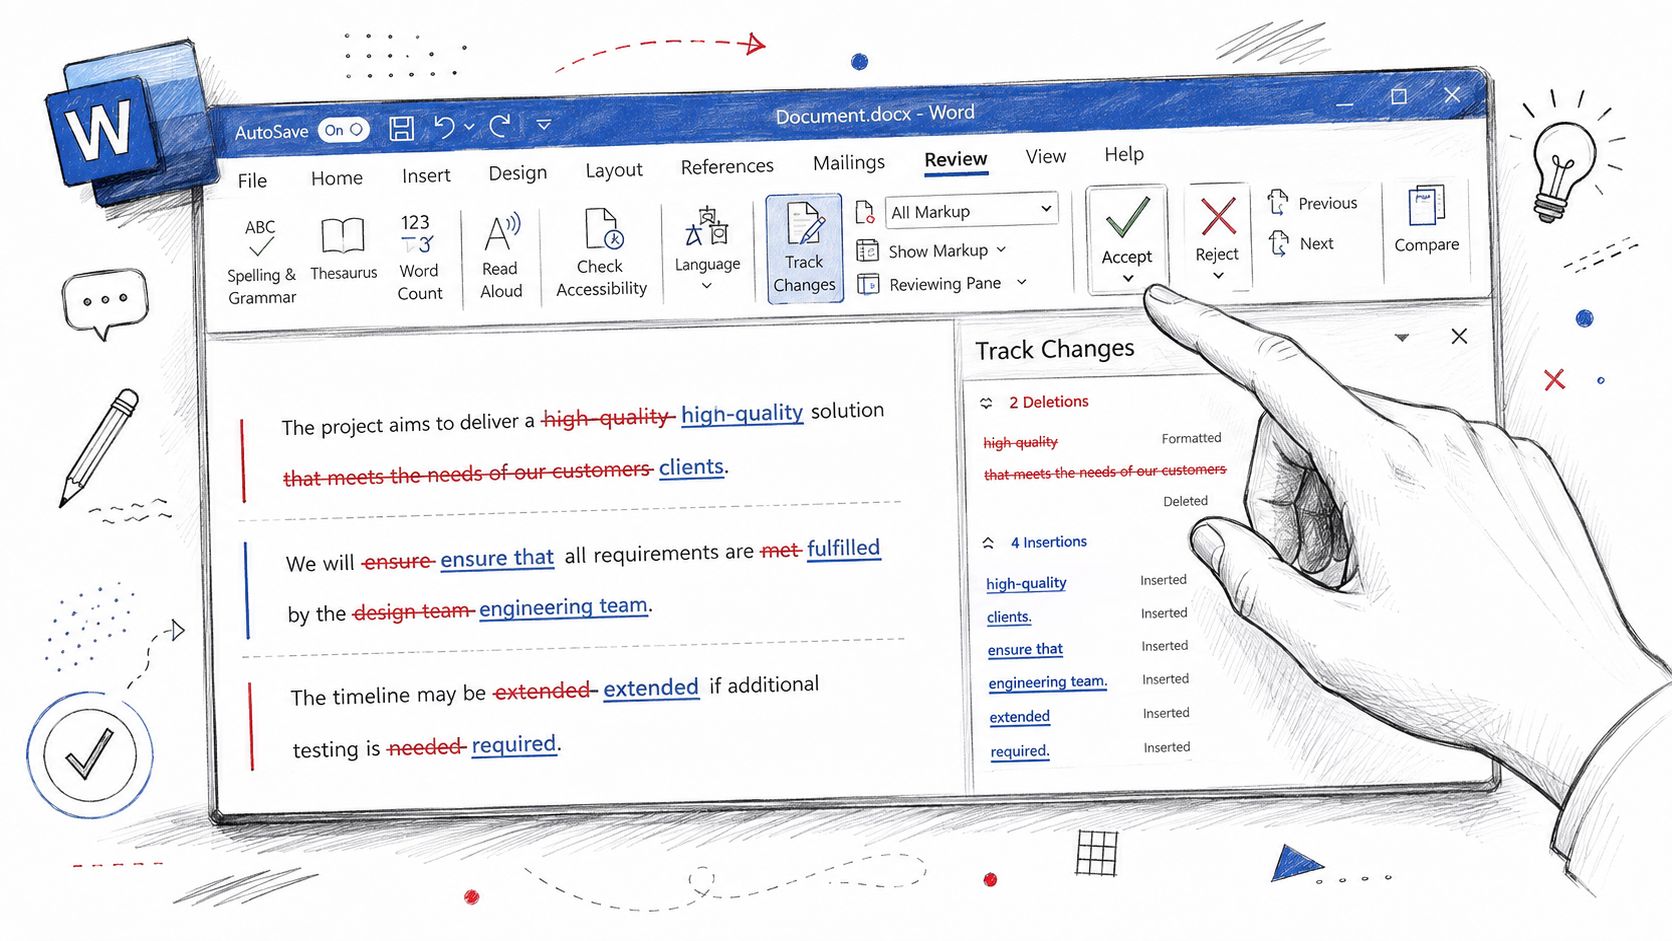
A dependable merge routine looks like this:
- Save the untouched comparison.
- Confirm the original and revised roles.
- Review each revision with Previous and Next.
- Accept or reject based on the approved decision.
- Handle comments separately.
- Save the merged document under a new name.
- Reopen the clean copy and check headings, tables, pagination, and signatures.
That last pass matters because accepting revisions can change layout. A document that reads correctly in markup view still needs a final presentation check before distribution.
Habits and Quick Fixes for Cleaner Comparisons
Use this short routine before every important comparison:
- Match formats: Prepare compatible
.docxor.docworking copies. - Protect originals: Back up both source files before running Compare.
- Check identity: Confirm filenames, revision state, metadata, tables, and document boundaries.
- Choose sensitivity: Use character level for micro-edits and word level for broader prose changes.
- Inspect All Markup: Don't approve a clean-looking view without reviewing the full redline.
- Archive deliberately: Keep the originals, comparison file, and approved clean copy according to your team's process.
If no changes appear, verify the selected roles and reopen suspicious files. If Compare is unavailable or greyed out, close extra Word instances, check that both files are accessible, and confirm that the documents aren't in a damaged compatibility state. A quick grammar-checking reference can support the final language pass, but it won't replace a document redline.
Document comparison began before personal computers, when reviewers printed two versions and inspected hard copies manually (document comparison history). Modern tools still emphasize speed, version control, and visual redlining because those are the practical problems the workflow was built to solve. Make Compare Documents part of your regular review habit, especially whenever two people have edited the same file.
If you regularly review Word drafts, save this workflow beside your editorial checklist and run Compare before approving a final version. For related website and technology research, visit AI Website Detector to scan a site, identify its underlying stack, and review the evidence behind the result.